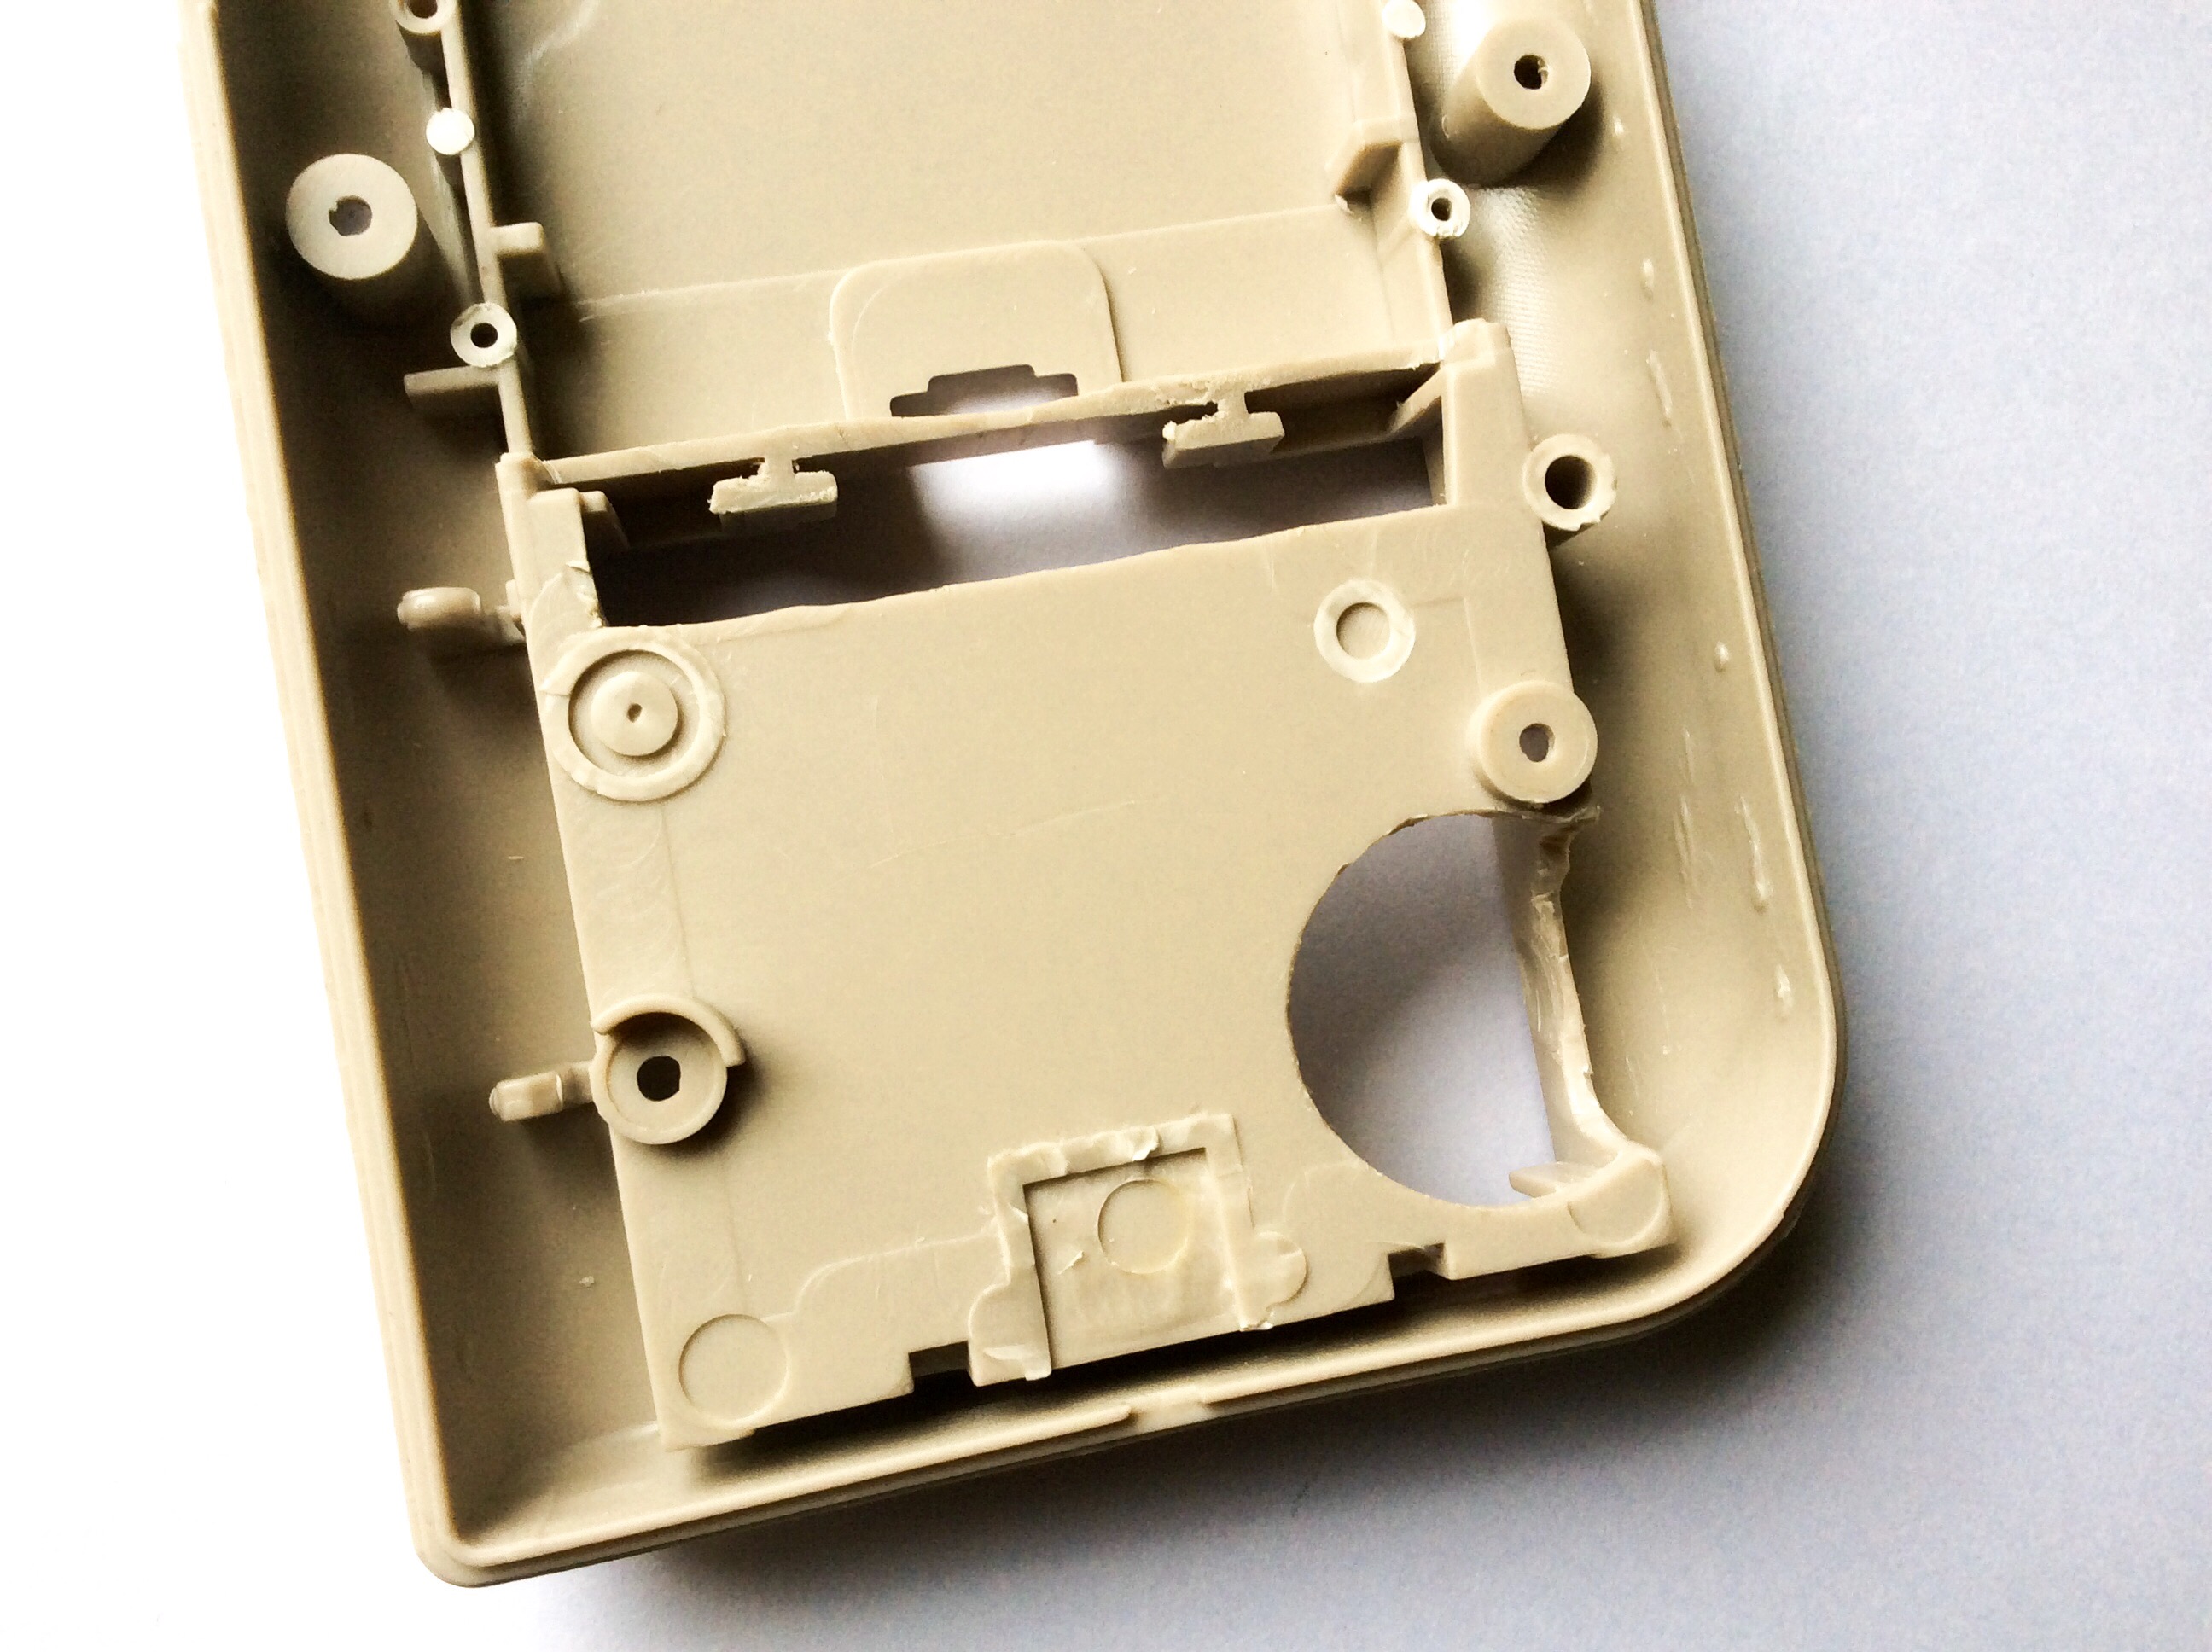
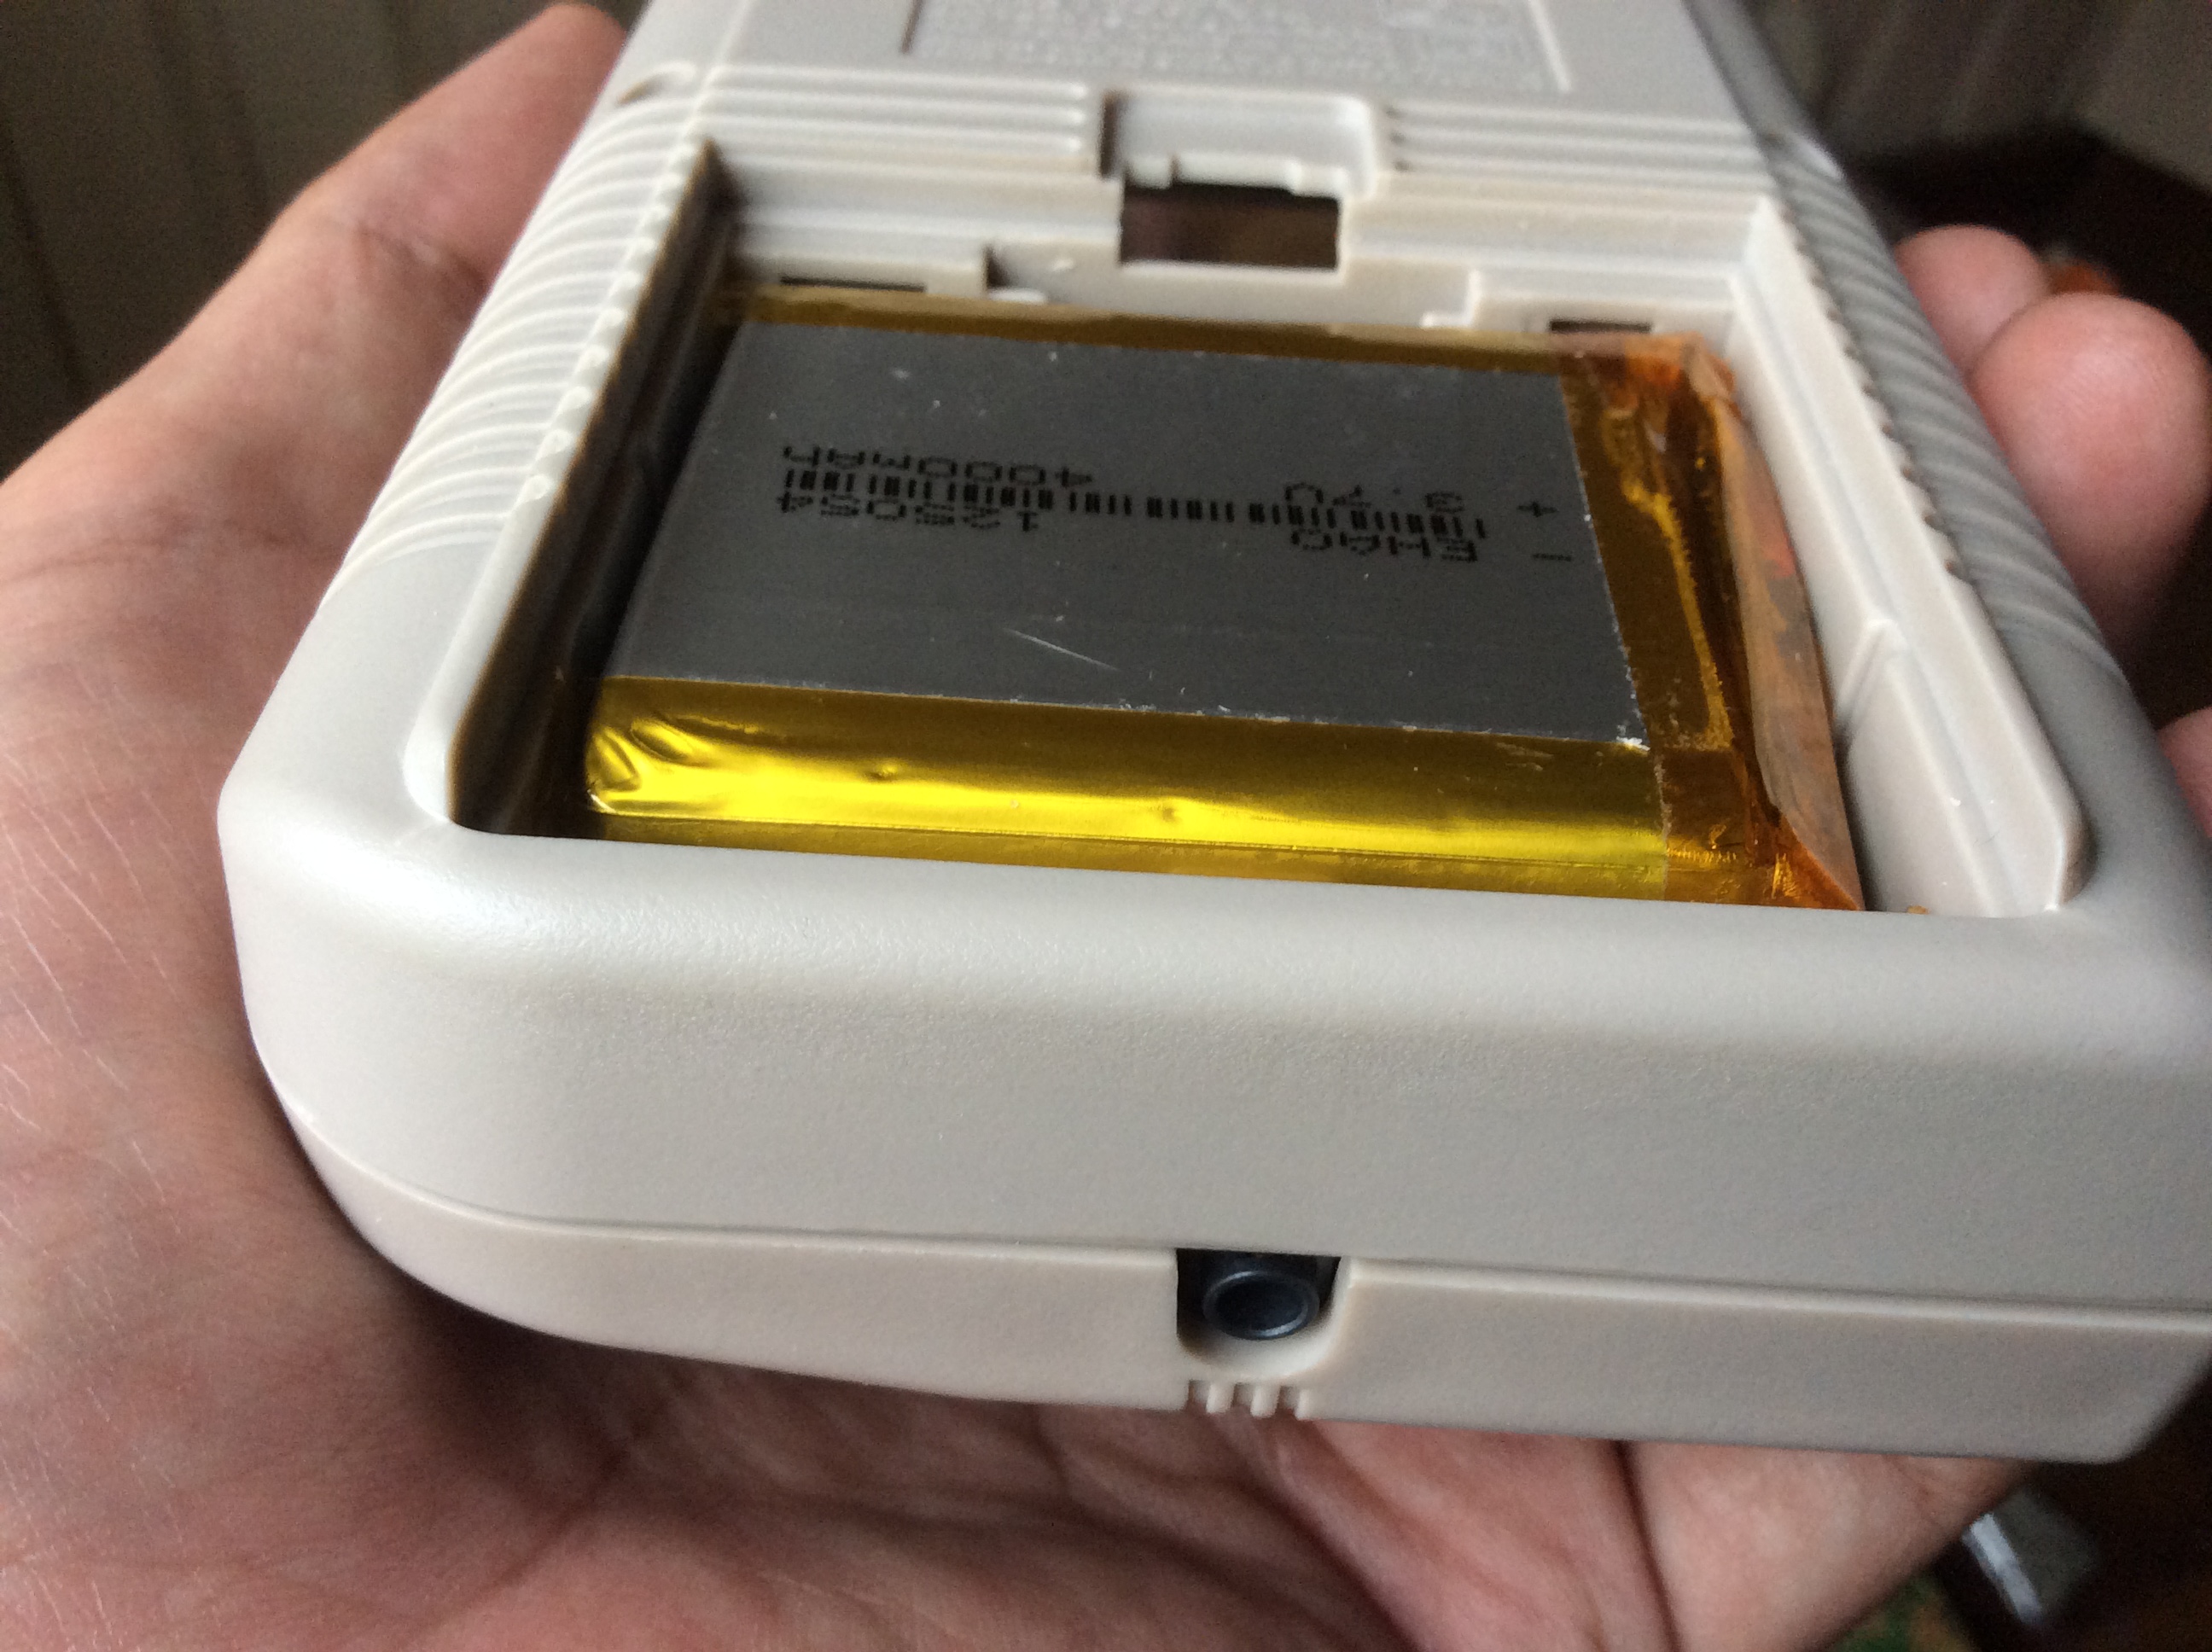
This is the recommended back case mod for my tinkerBOY Speaker 4O2W. You don’t even need to glue the speaker to the front case.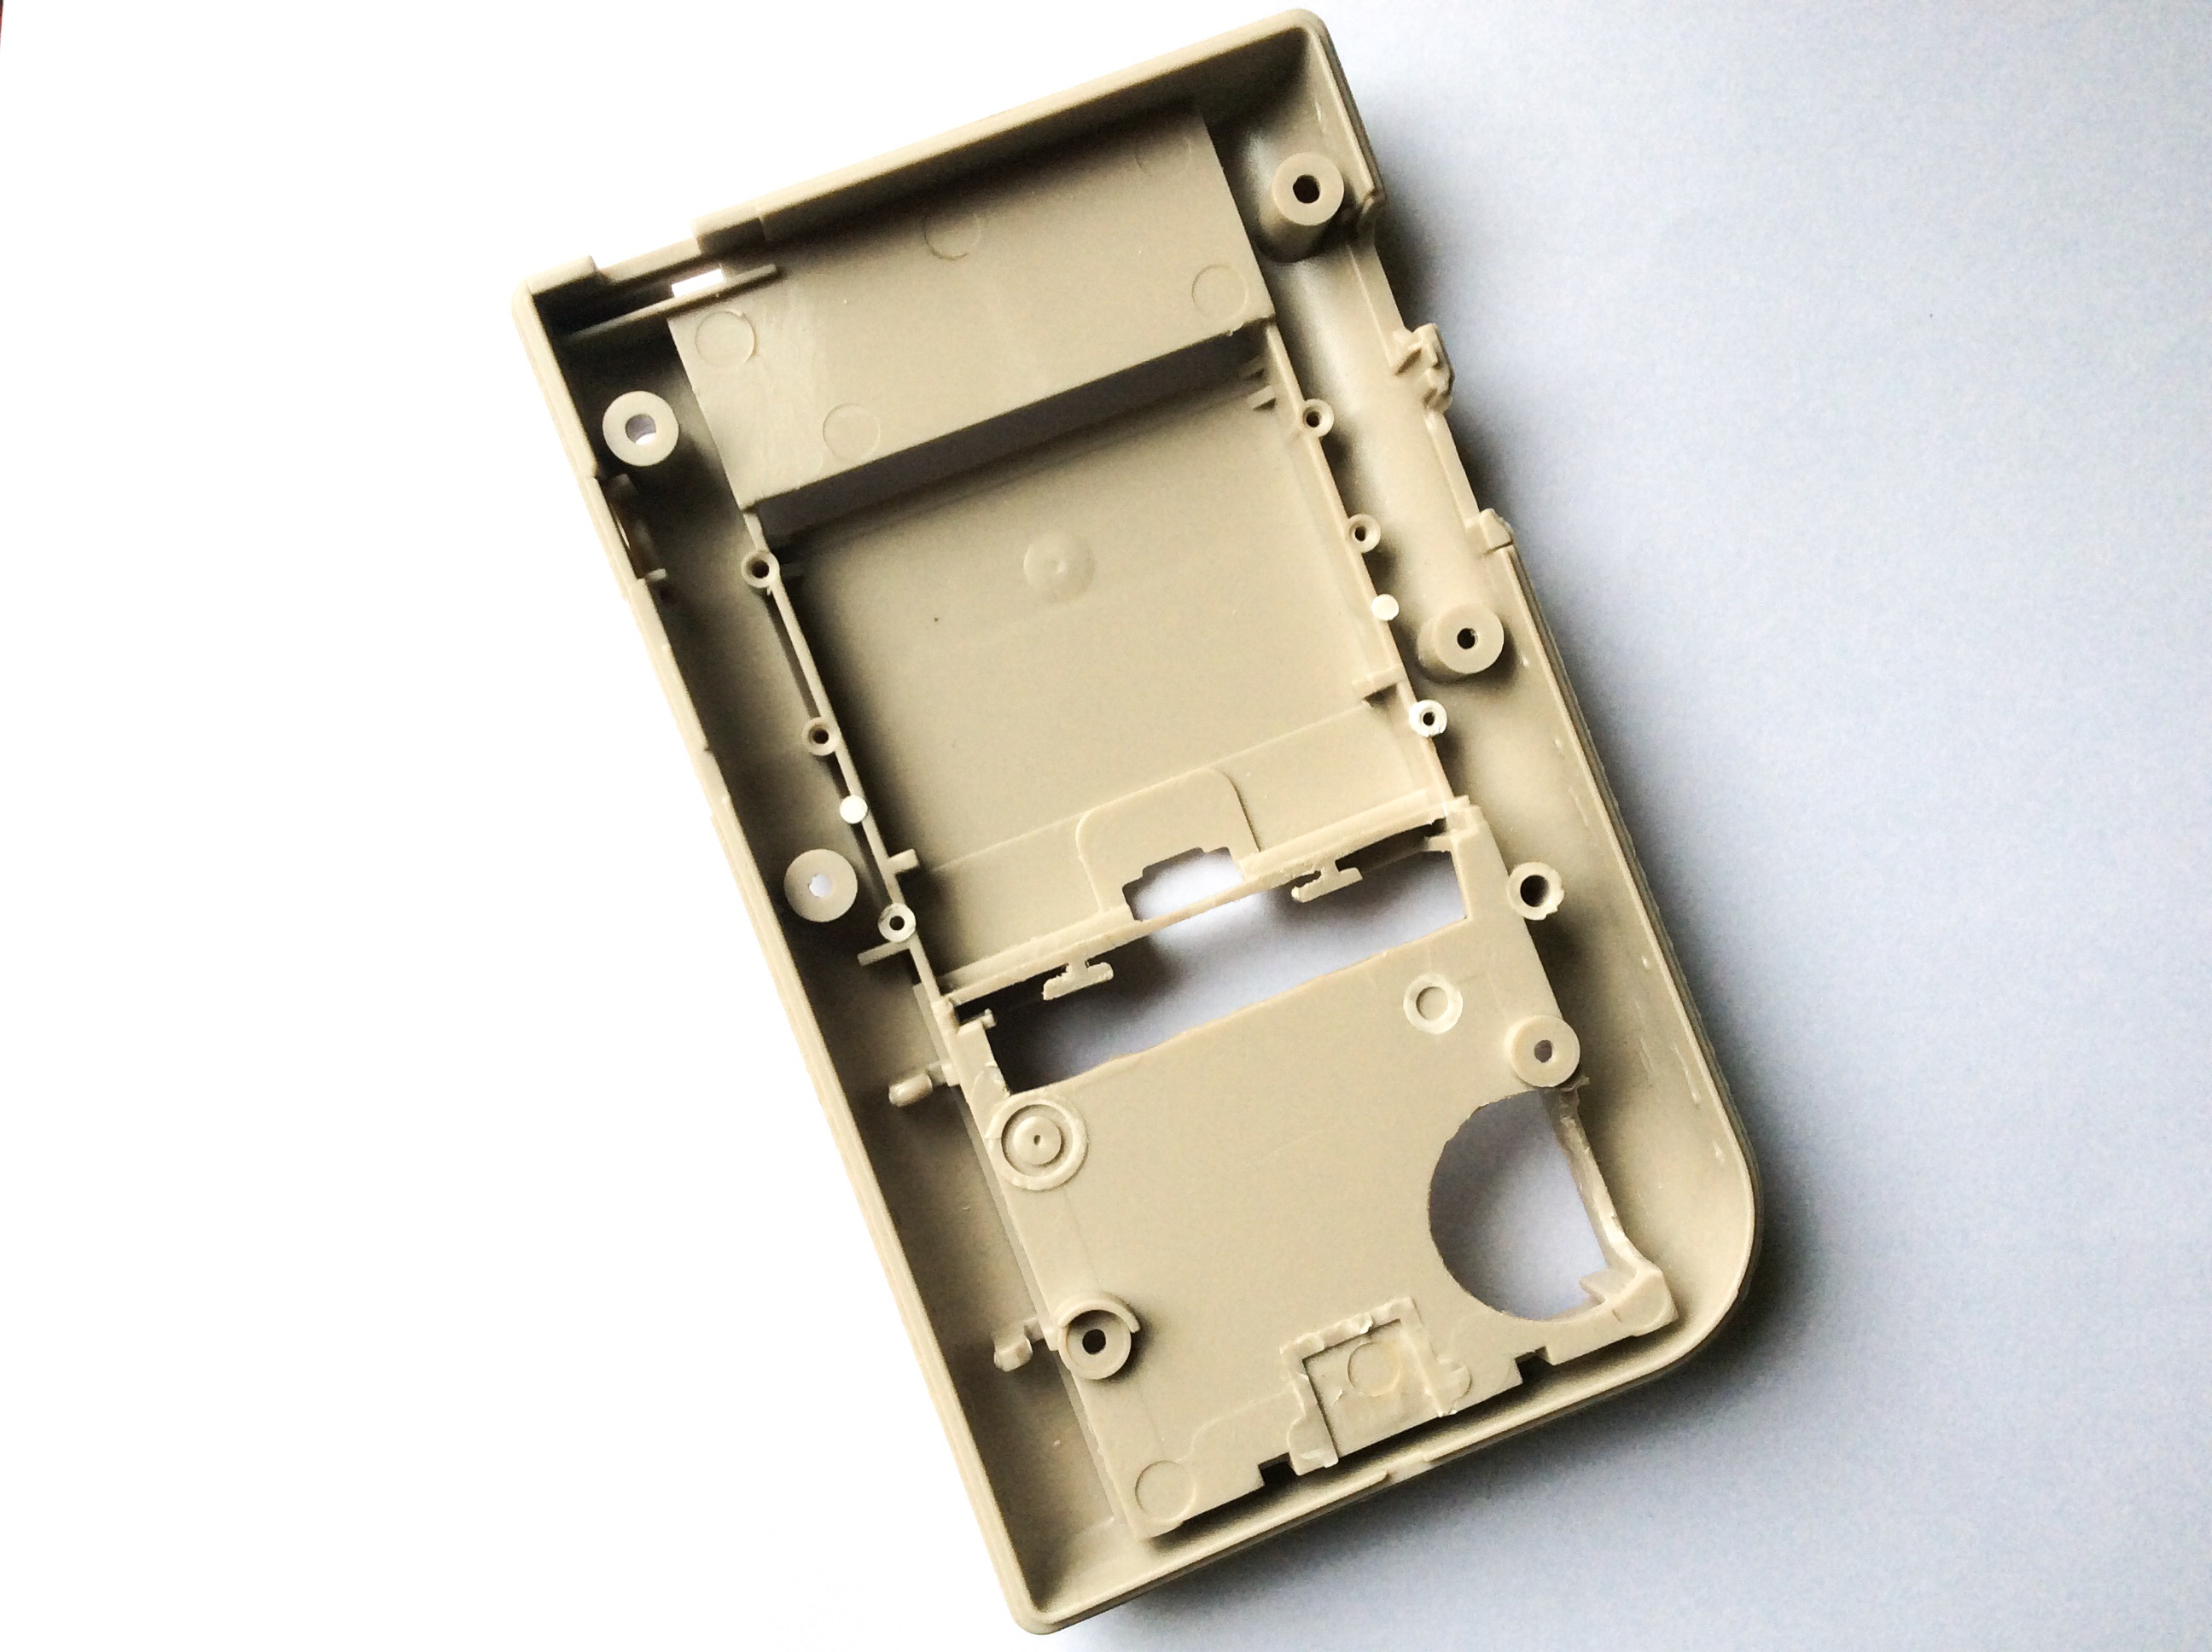
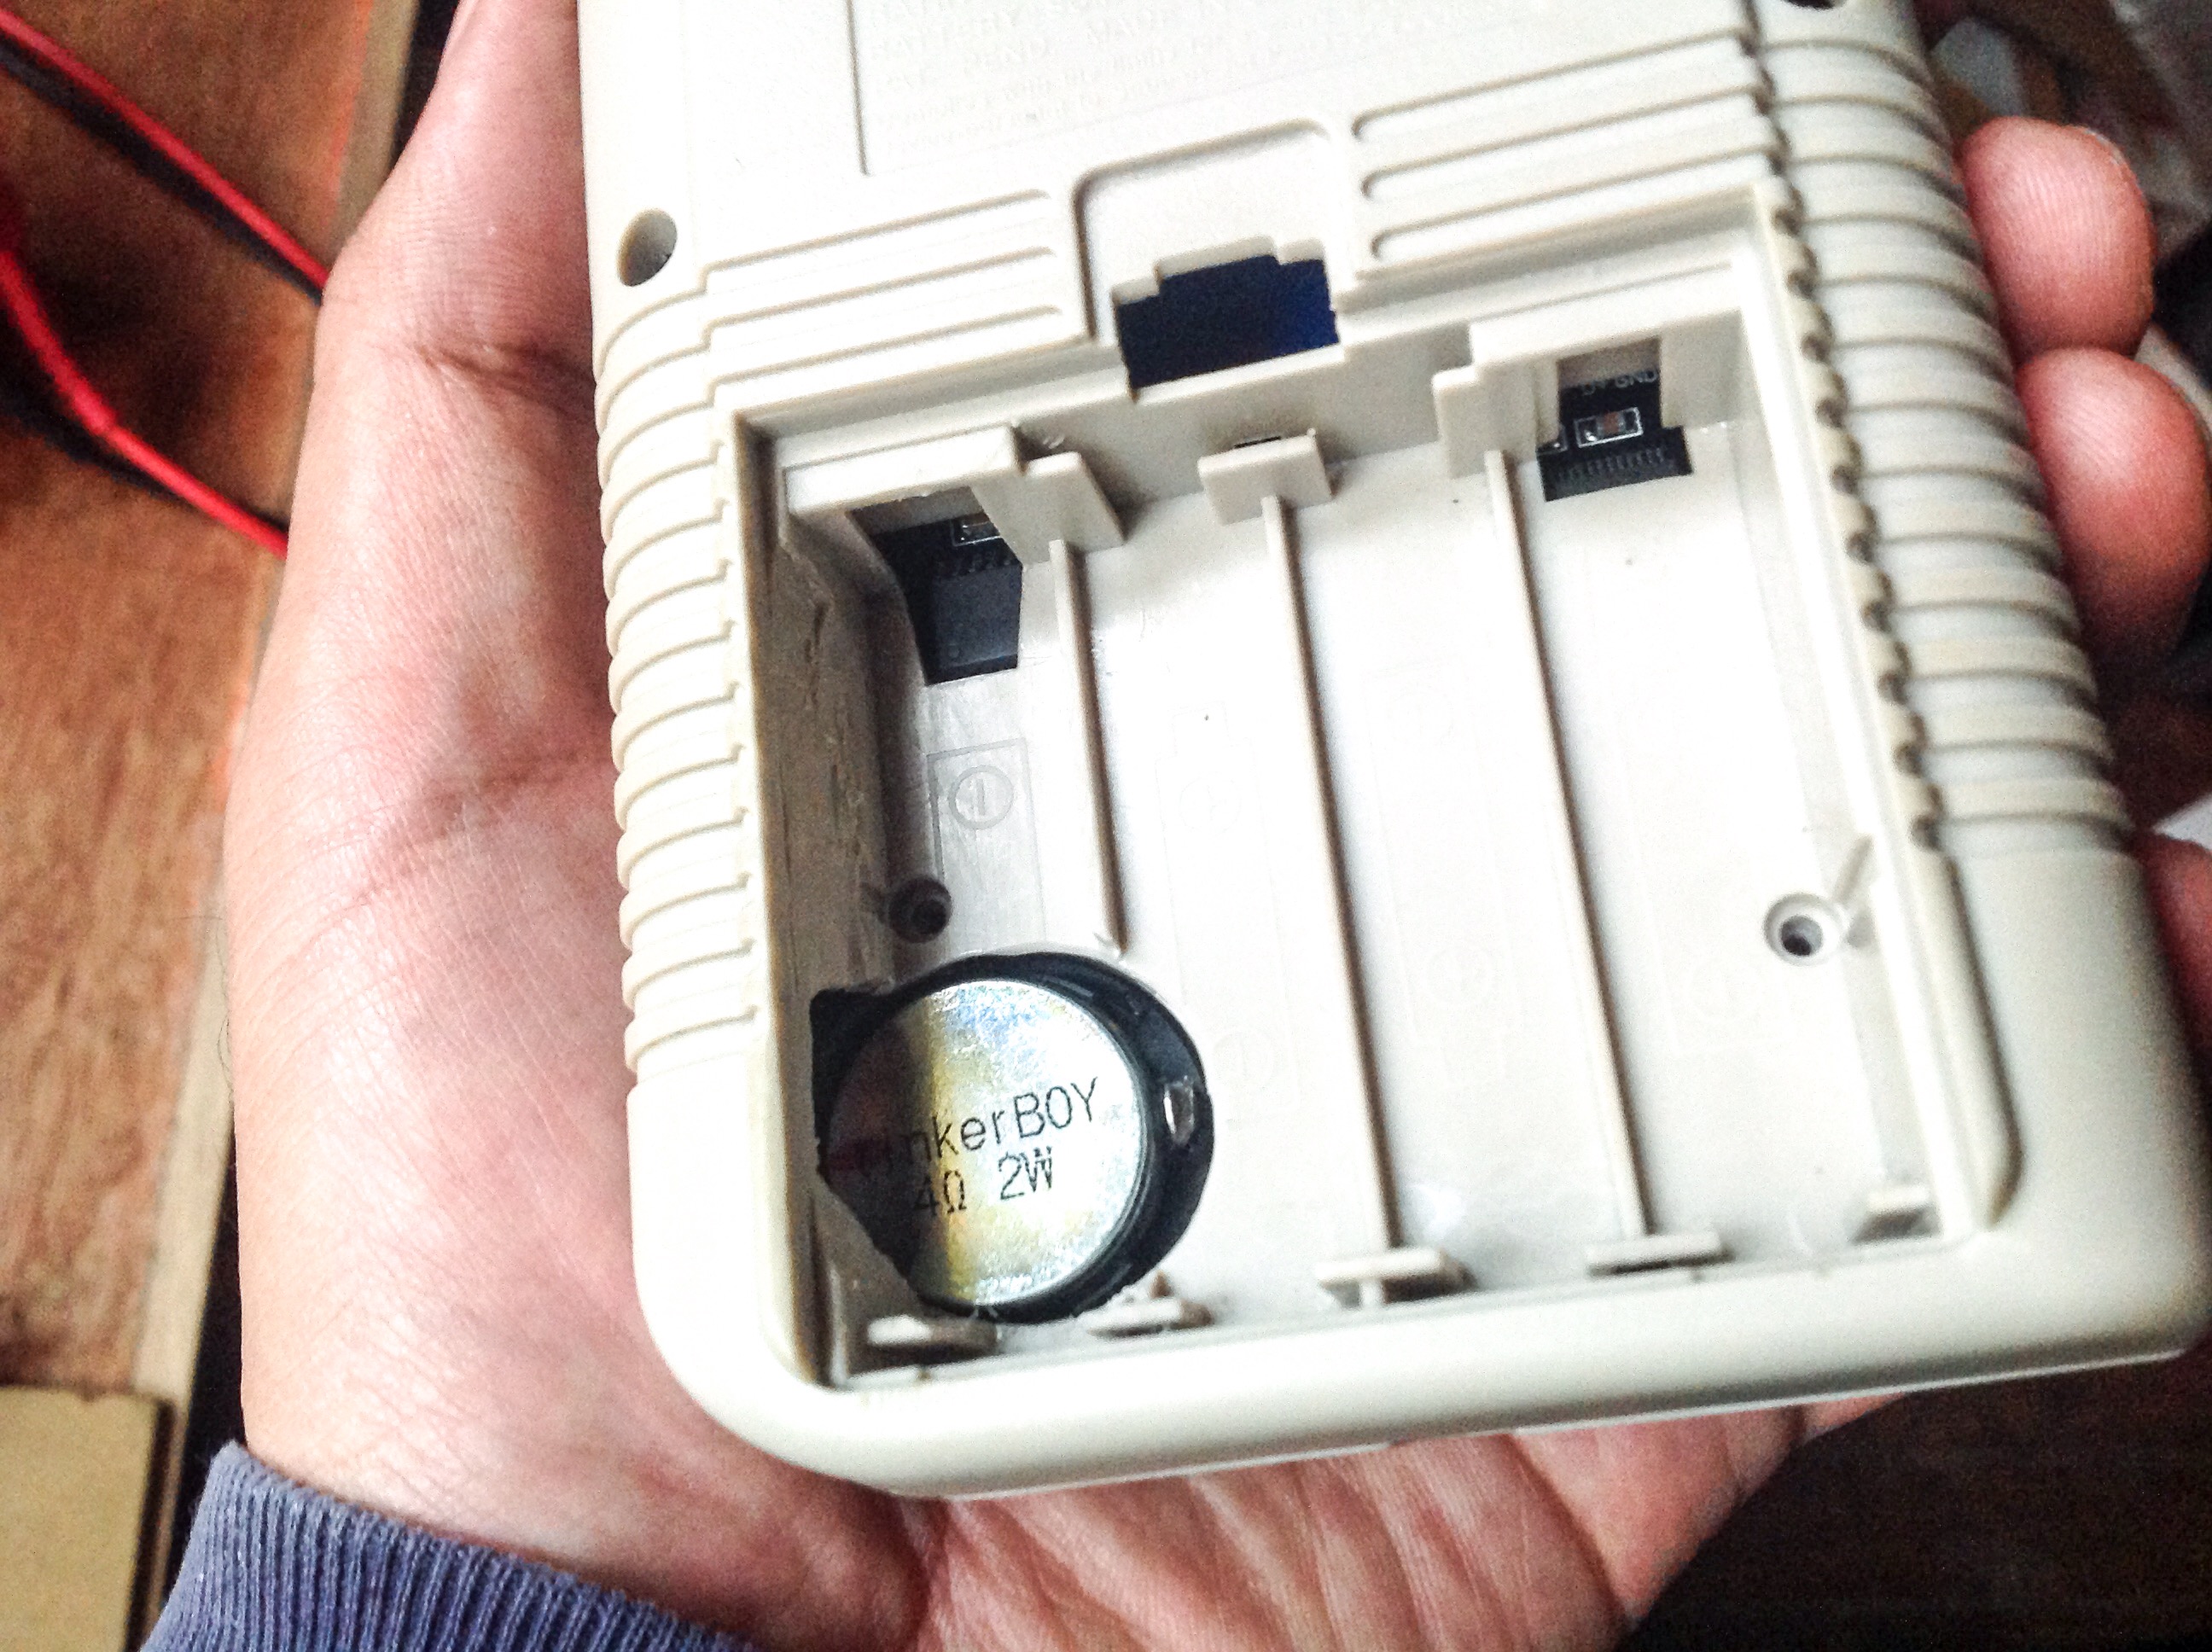
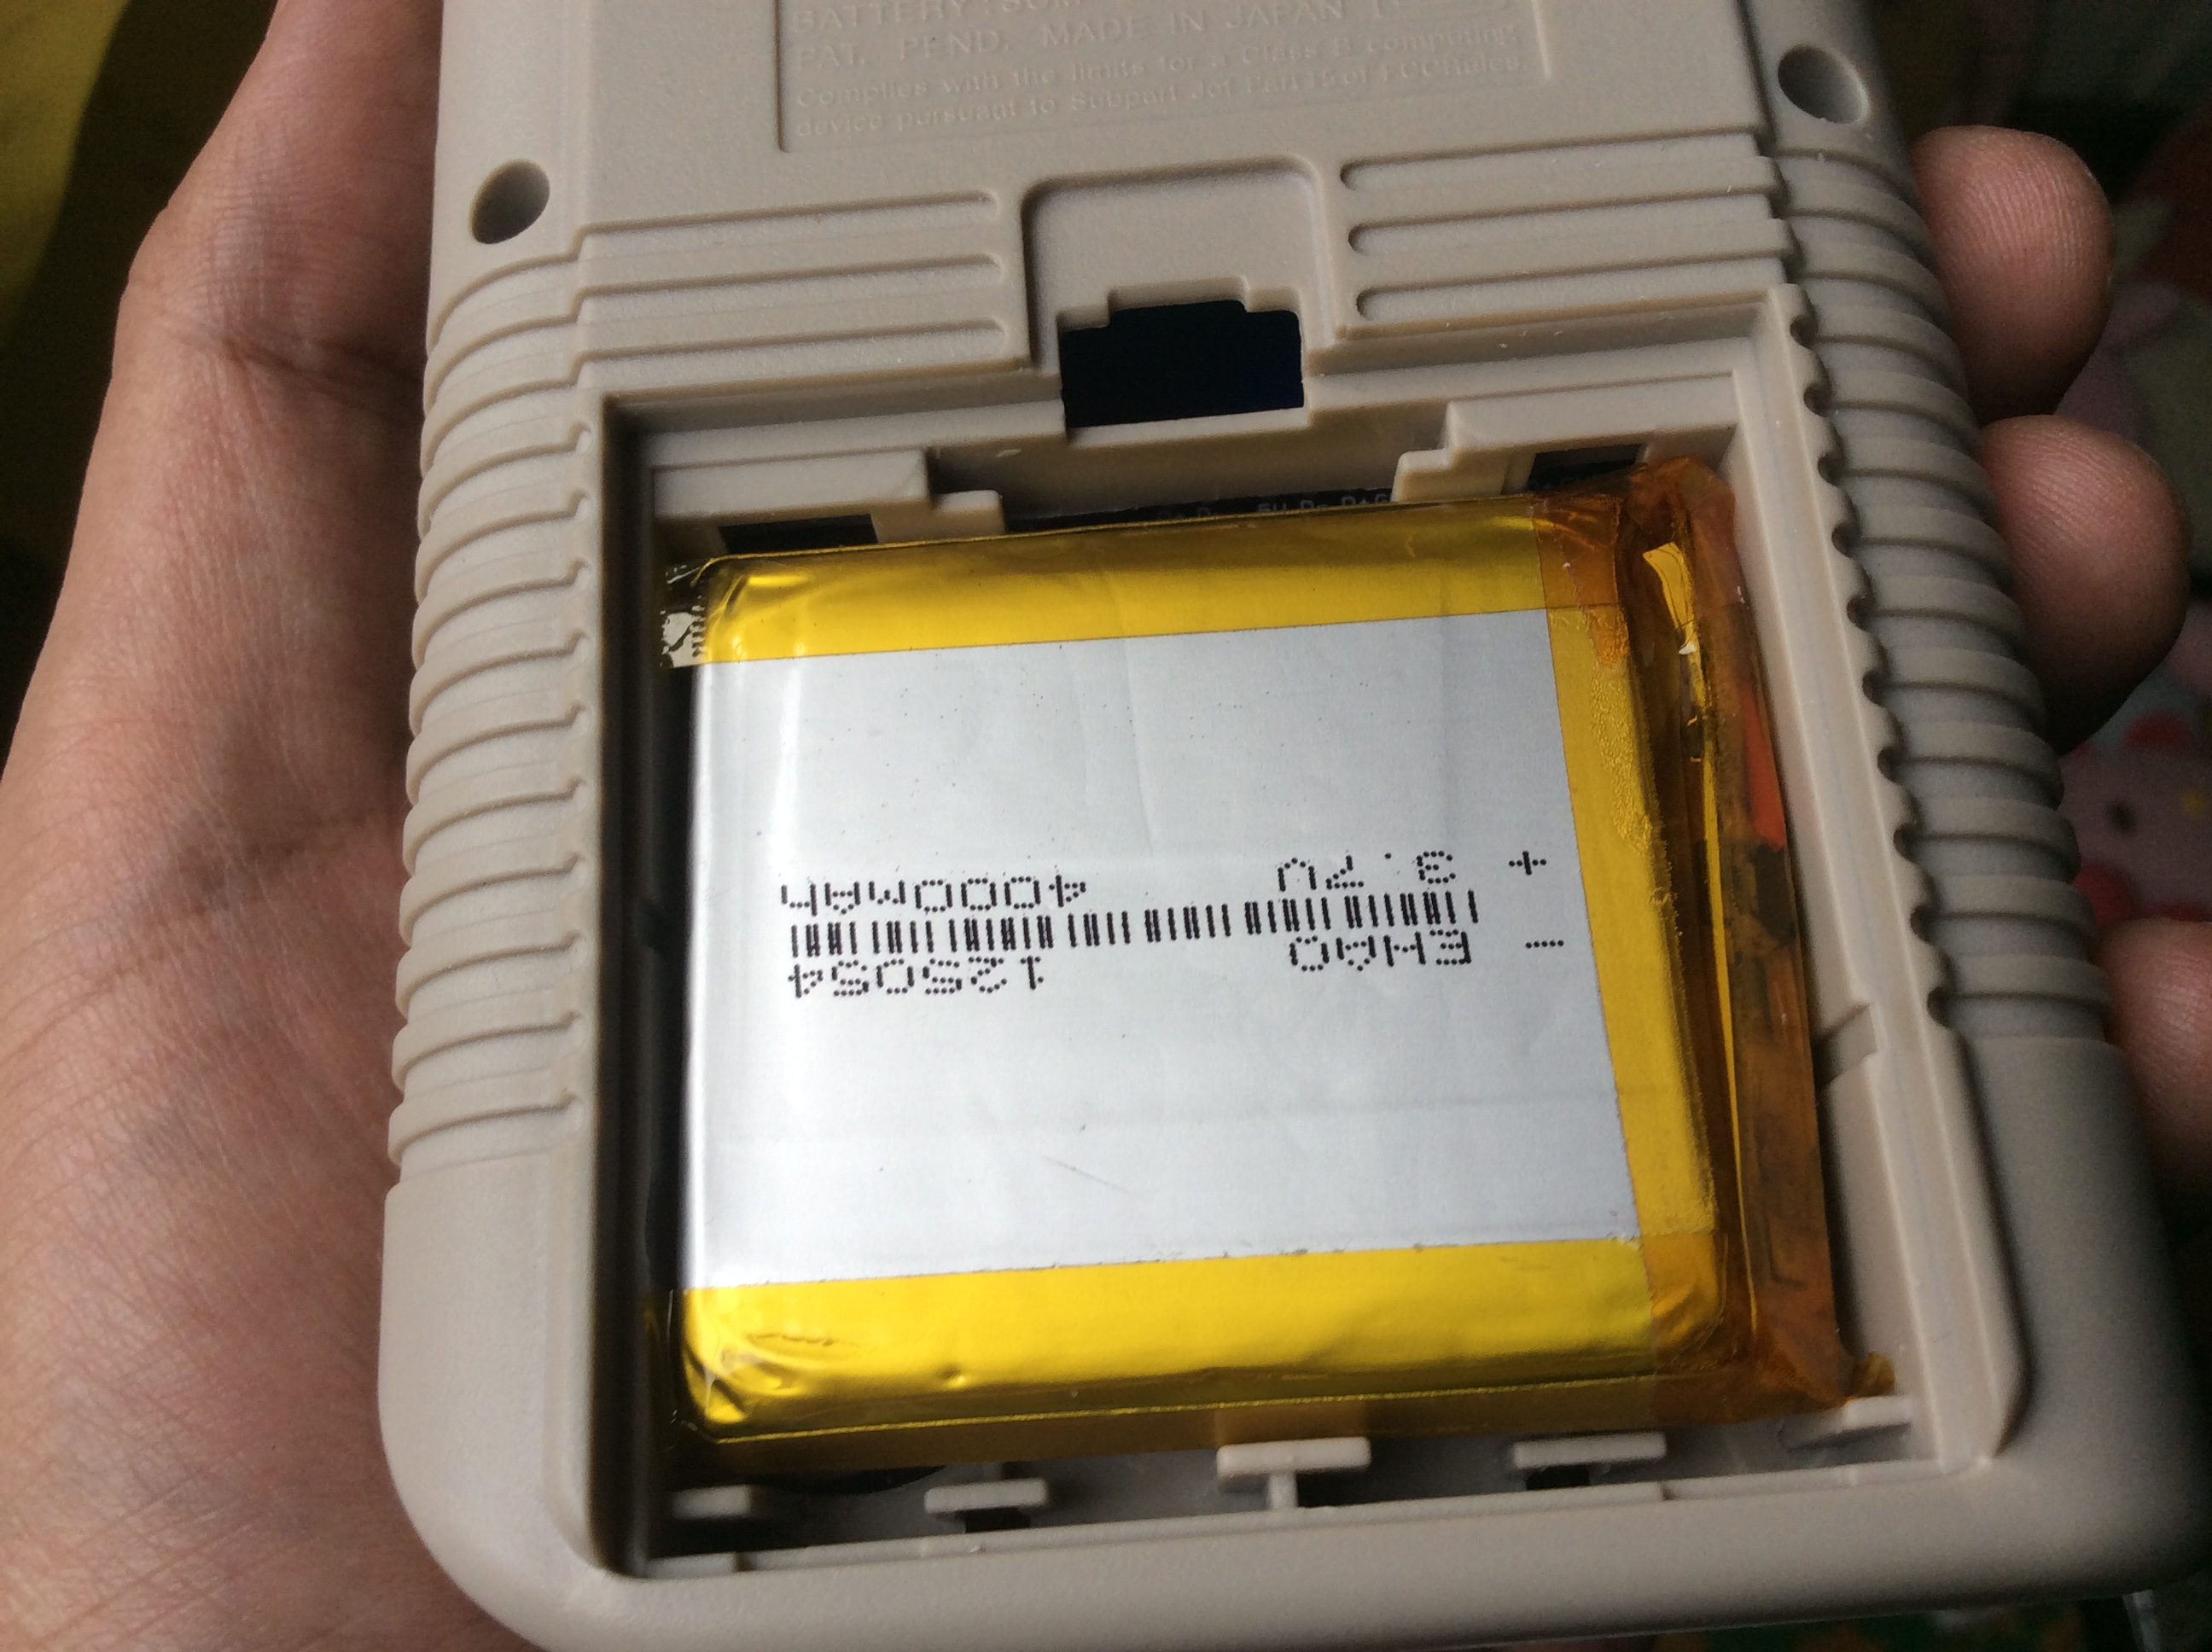
Battery fits perfectly:
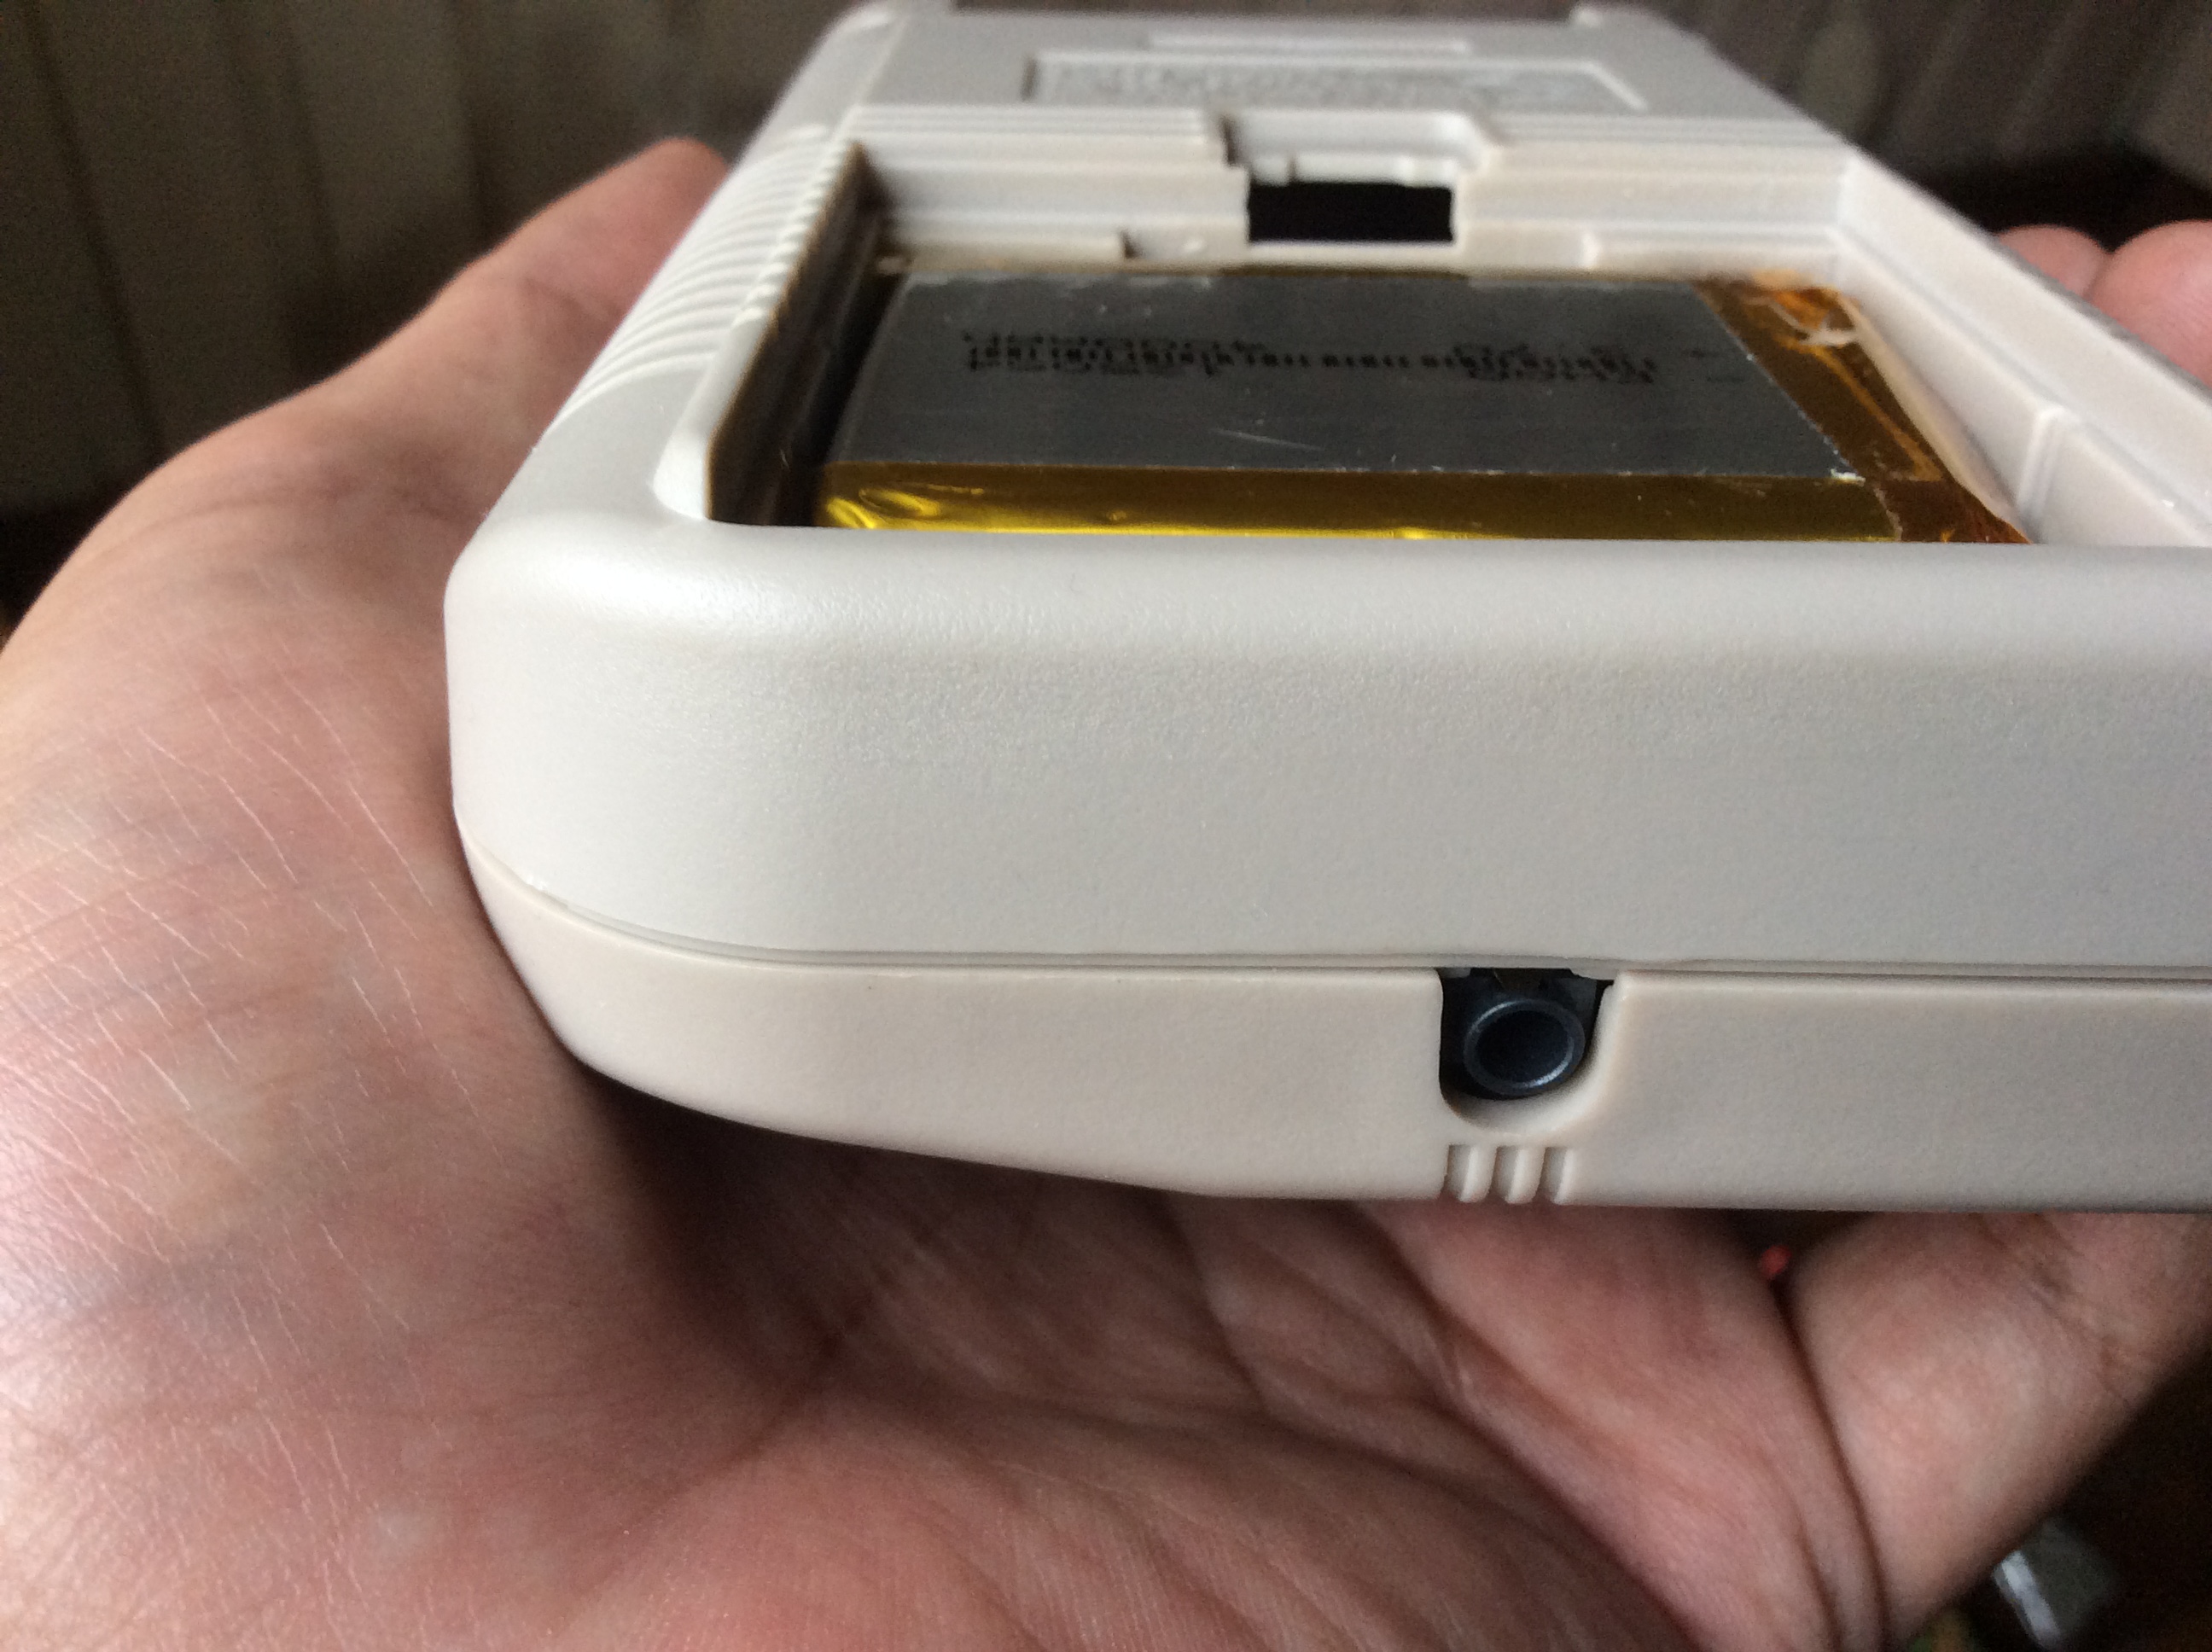
This is the recommended back case mod for my tinkerBOY Speaker 4O2W. You don’t even need to glue the speaker to the front case.
Battery fits perfectly:
Digital Volume is enabled by default so if you want to use the usual Analog Volume Wheel, you need to disable it and there are two ways you can that:
Press and hold the “SELECT” button for 15 seconds to disable Digital Volume and reboot.
With the builtin usb serial communication of the tinkerBOY Controller v3.0 you can easily enable or disable Digital Volume In order to do that, you need install the minicom program by following the instruction at tinkerBOY Controller v3.0: Settings or proceed if you’re using my pre-built RetroPie image..
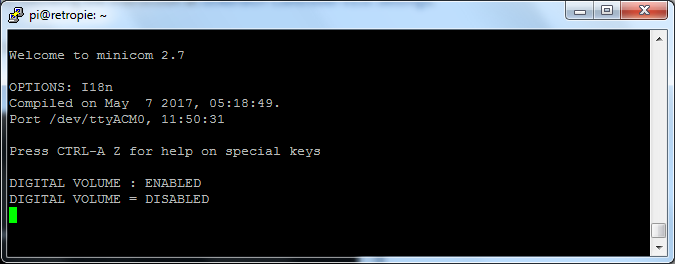
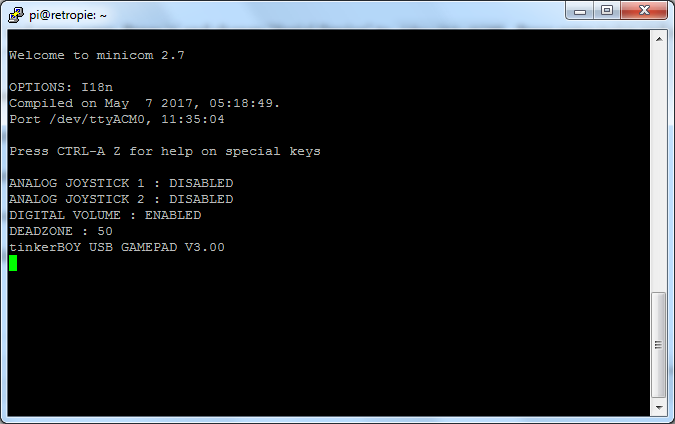
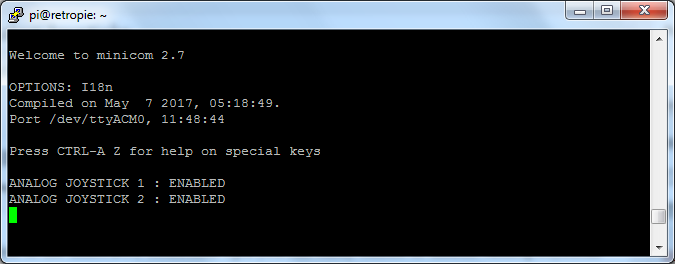
Start minicom by typing sudo minicom. Start by checking the current status of the Digital Volume by pressing ‘d’.
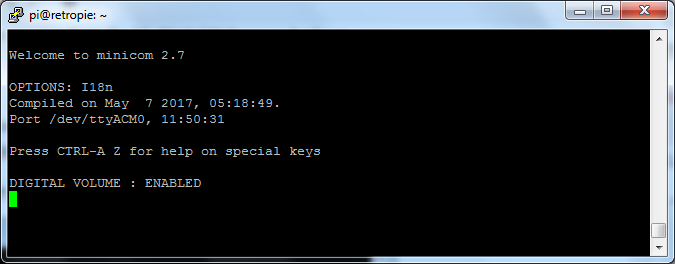
Here’s how to enable or disable it:
That’s it. 🙂
You can change some settings on your tinkerBOY Controller v3.0 by communicating with it via USB serial using a program called minicom.
Get Started
Login to your Pi via SSH or hit F4 to go to the command line. Install minicom by typing the following command:
sudo apt-get install minicom
Type “y” and press enter.

Wait for it to install.
Setup The Program
Before you can use minicom you need set it up to communicate with the your v3.0 board. Type the following:
sudo minicom -s
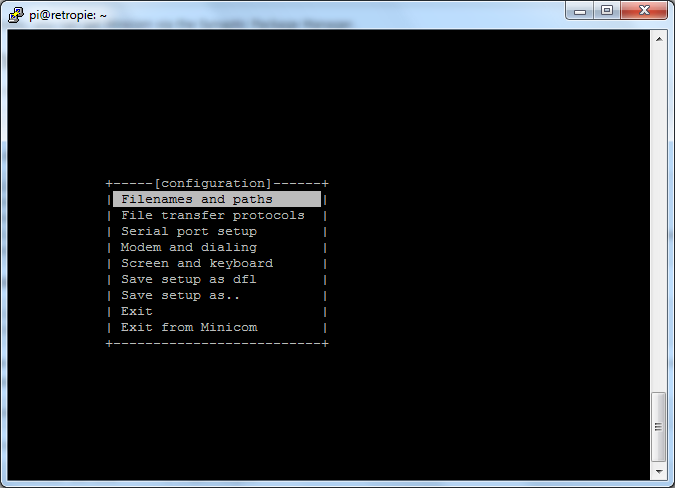
Select “Serial port setup” and press enter. Press ‘a’ and change “Serial Device” to /dev/ttyACM0. Press enter twice and select ” Save setup as dfl”. Select “Exit” and press enter.
Commands you can use to display the status of a particular setting:
a – for displaying the current Analog Joystick settings.
d – for displaying the current Digital Volume setting.
v – for the current software version.
z – for the Deadzone value.
You can exit the program by “CTRL + A” then press ‘X’.
This guide will help you setup the USB Audio on the tinkerBOY Controller V3.0 as the default sound output device in RetroPie.
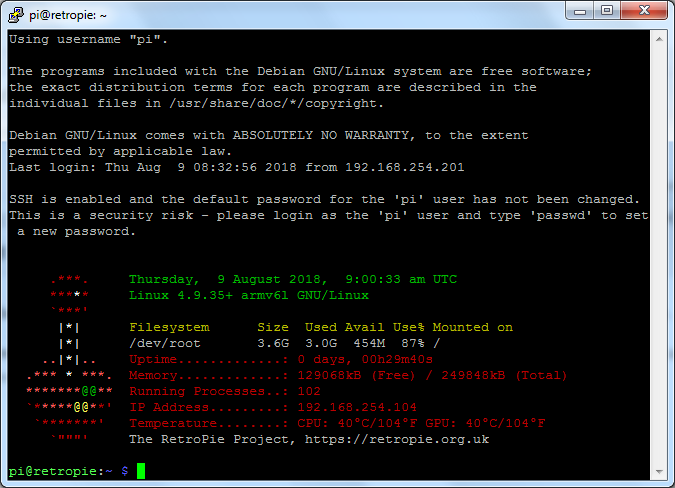
Assuming you’ve already followed the wiring guide and connected your v3.0 board to a Raspberry Pi, login via SSH or connect a keyboard and hit F4 to go to the command line.
First, check if usb audio is detected by typing:
cat /proc/asound/modules
Output should be something like:
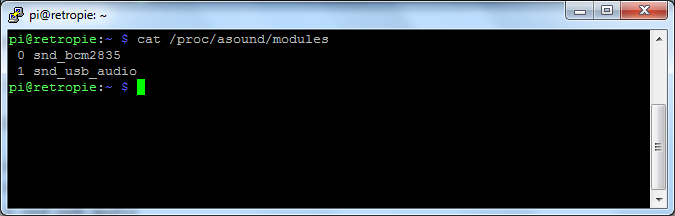
pi@retropie:~ $ cat /proc/asound/modules
0 snd_bcm2835 – This is the builtin sound device in Raspberry Pi.
1 snd_usb_audio – This is the USB Audio you need to setup as the default sound device.
pi@retropie:~ $
Now create a file by typing:
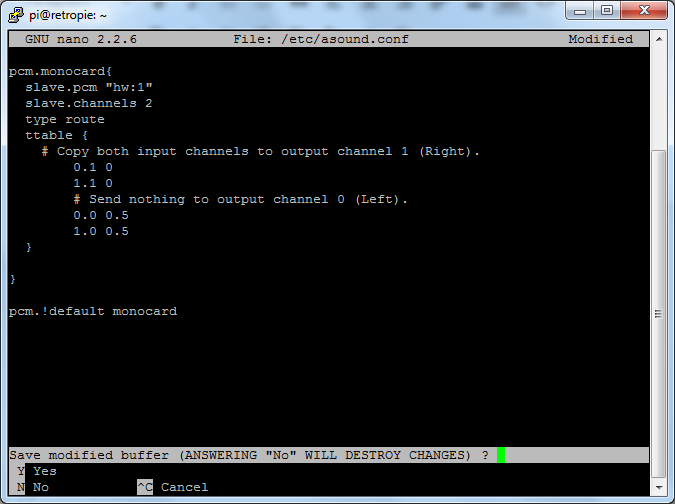
sudo nano /etc/asound.conf
Paste the following:
New(use this code instead of the old code):
pcm.!default {
  slave.pcm "hw:1"
  slave.channels 2
  type route
  ttable {
    # Copy both input channels to output channel 0 (Left).
    0.0 0.5
    1.0 0.5
    # Send nothing to output channel 1 (Right).
    0.1 0
    1.1 0
  }

}

ctl.!default {
  type hw
  card 1
}
Old:
pcm.monocard {
  slave.pcm "hw:1"
  slave.channels 2
  type route
  ttable {
    # Copy both input channels to output channel 1 (Right).
        0.1 0
        1.1 0
        # Send nothing to output channel 0 (Left).
        0.0 0.5
        1.0 0.5
  }

}
pcm.!default monocard
Finally, save the file by CTRL + X, press Y, and press ENTER.
Reboot by typing sudo reboot. You should be able to play sound from your v3.0 board.
By default, both of the analog joysticks on the tinkerBOY Controller v3.0 are disabled but you can enable or disable one or both by following How to Enable or Disable Analog Joysticks.
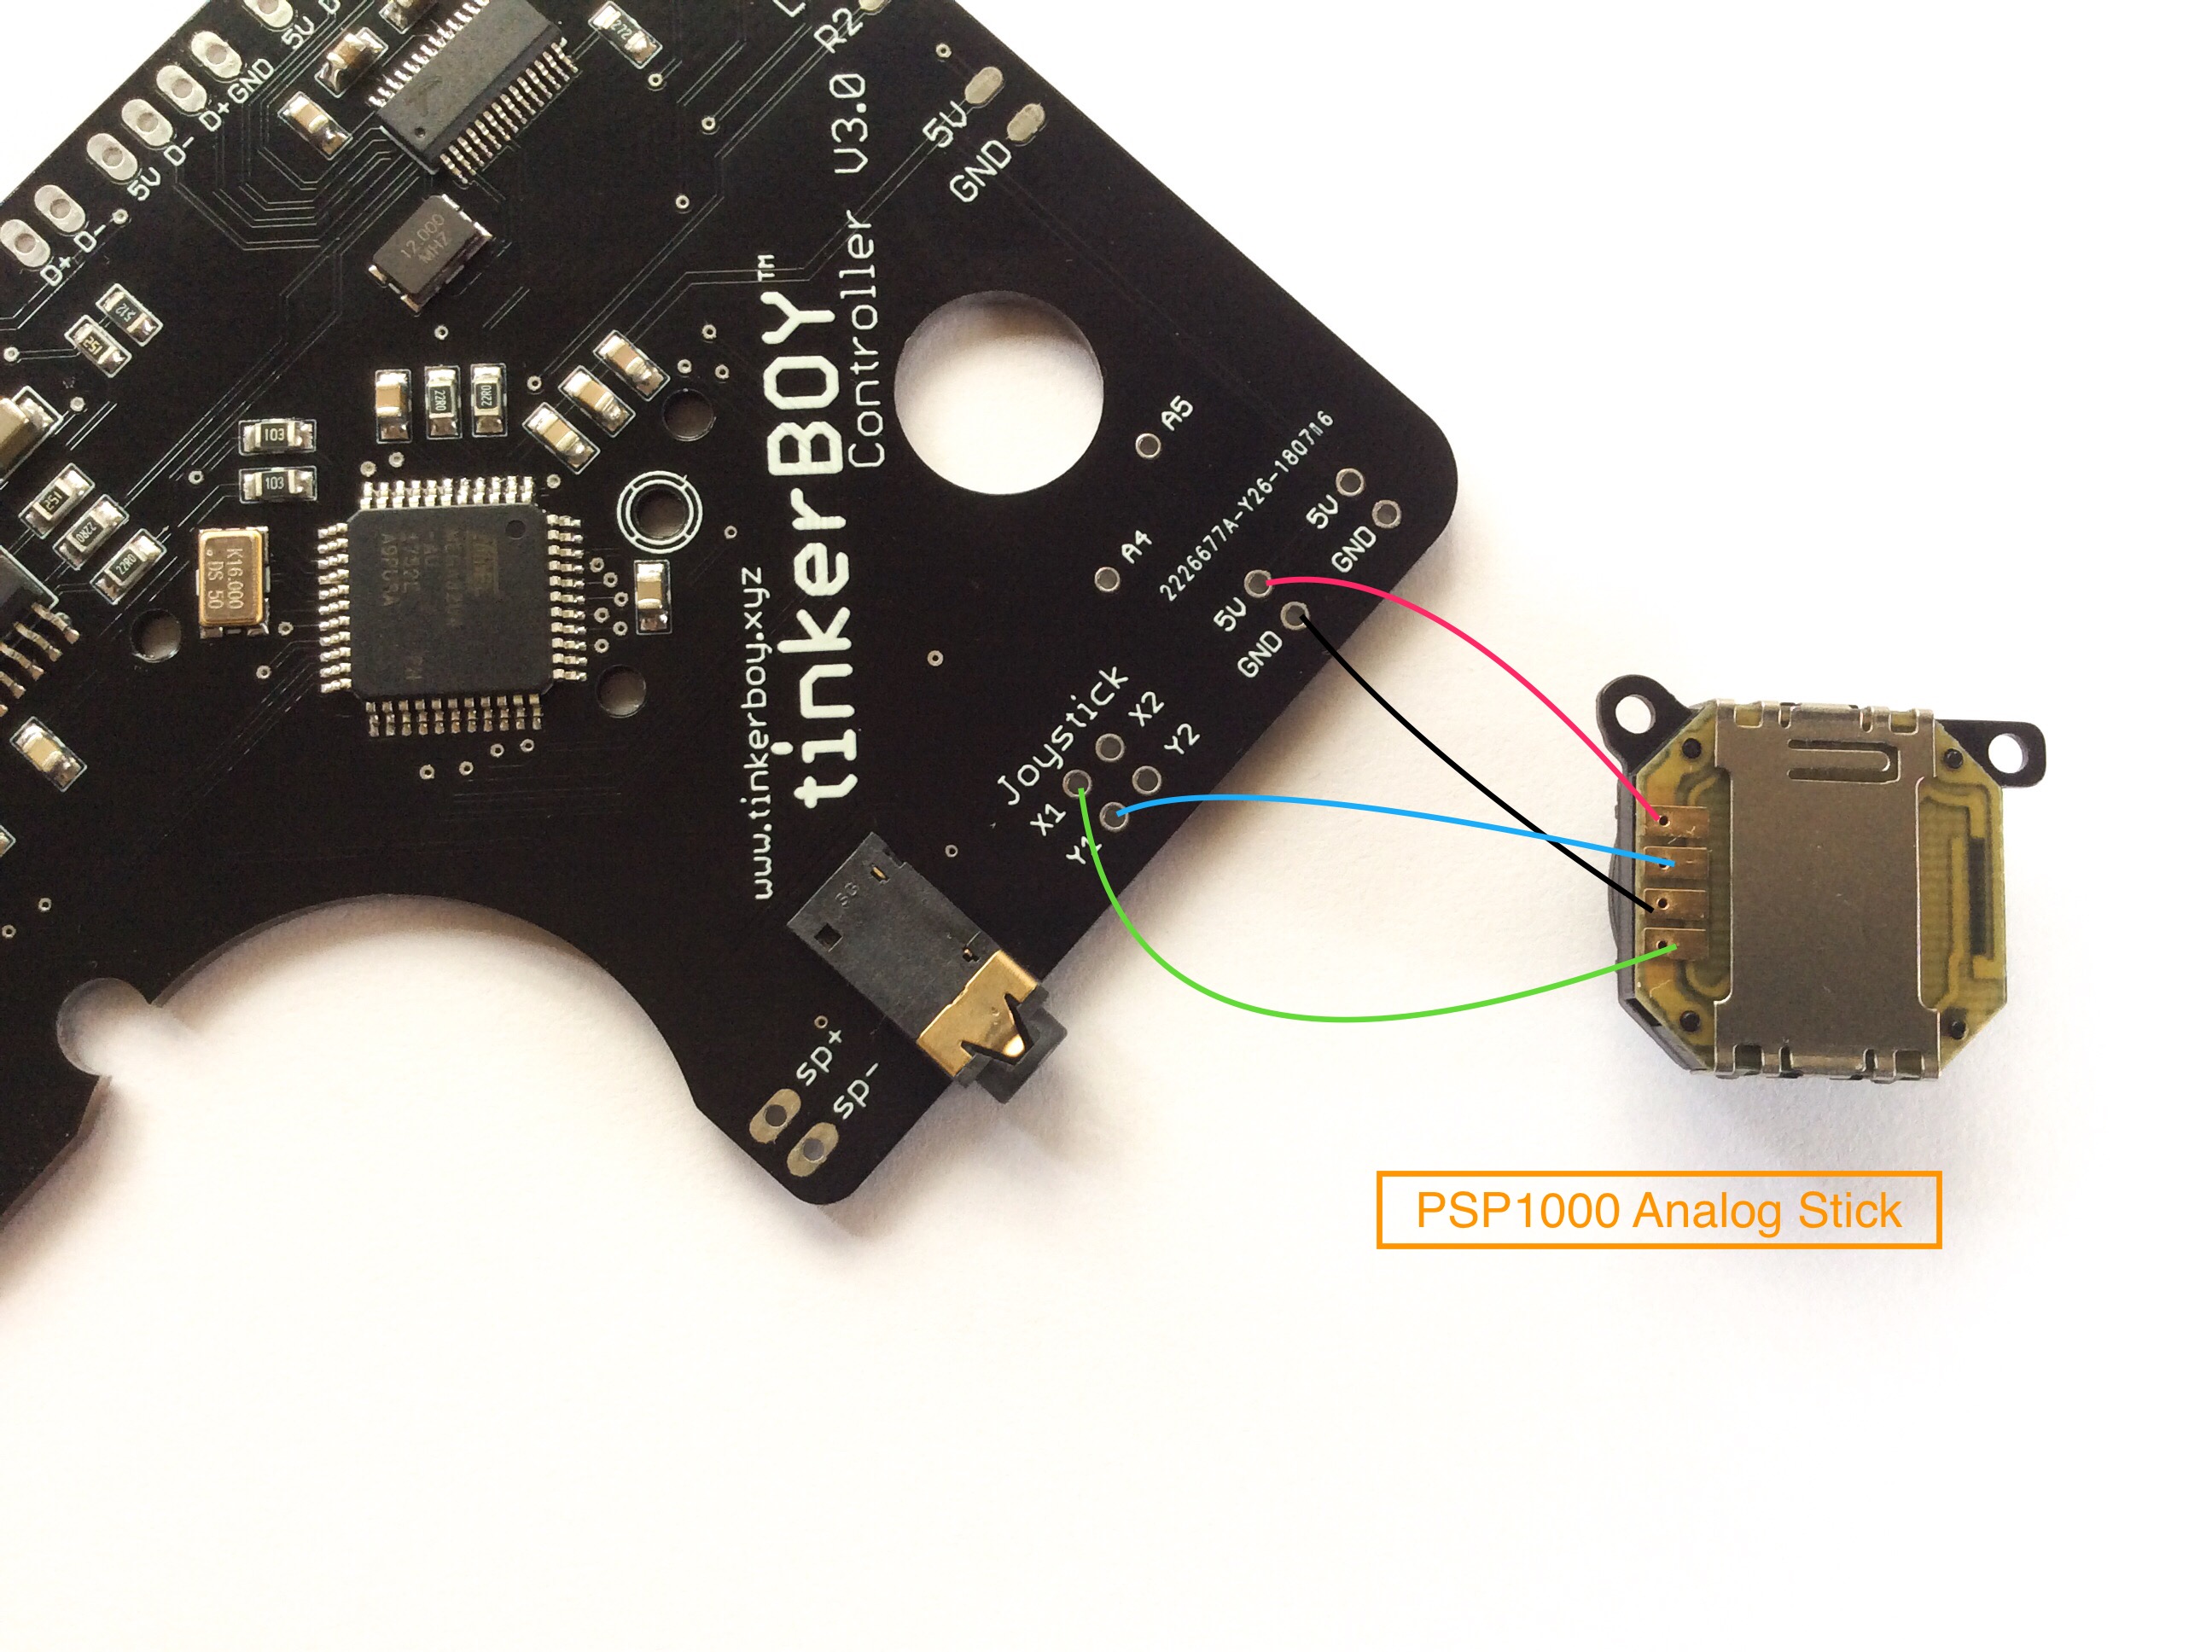
Here’s how to wire the PSP1000 Analog Stick:
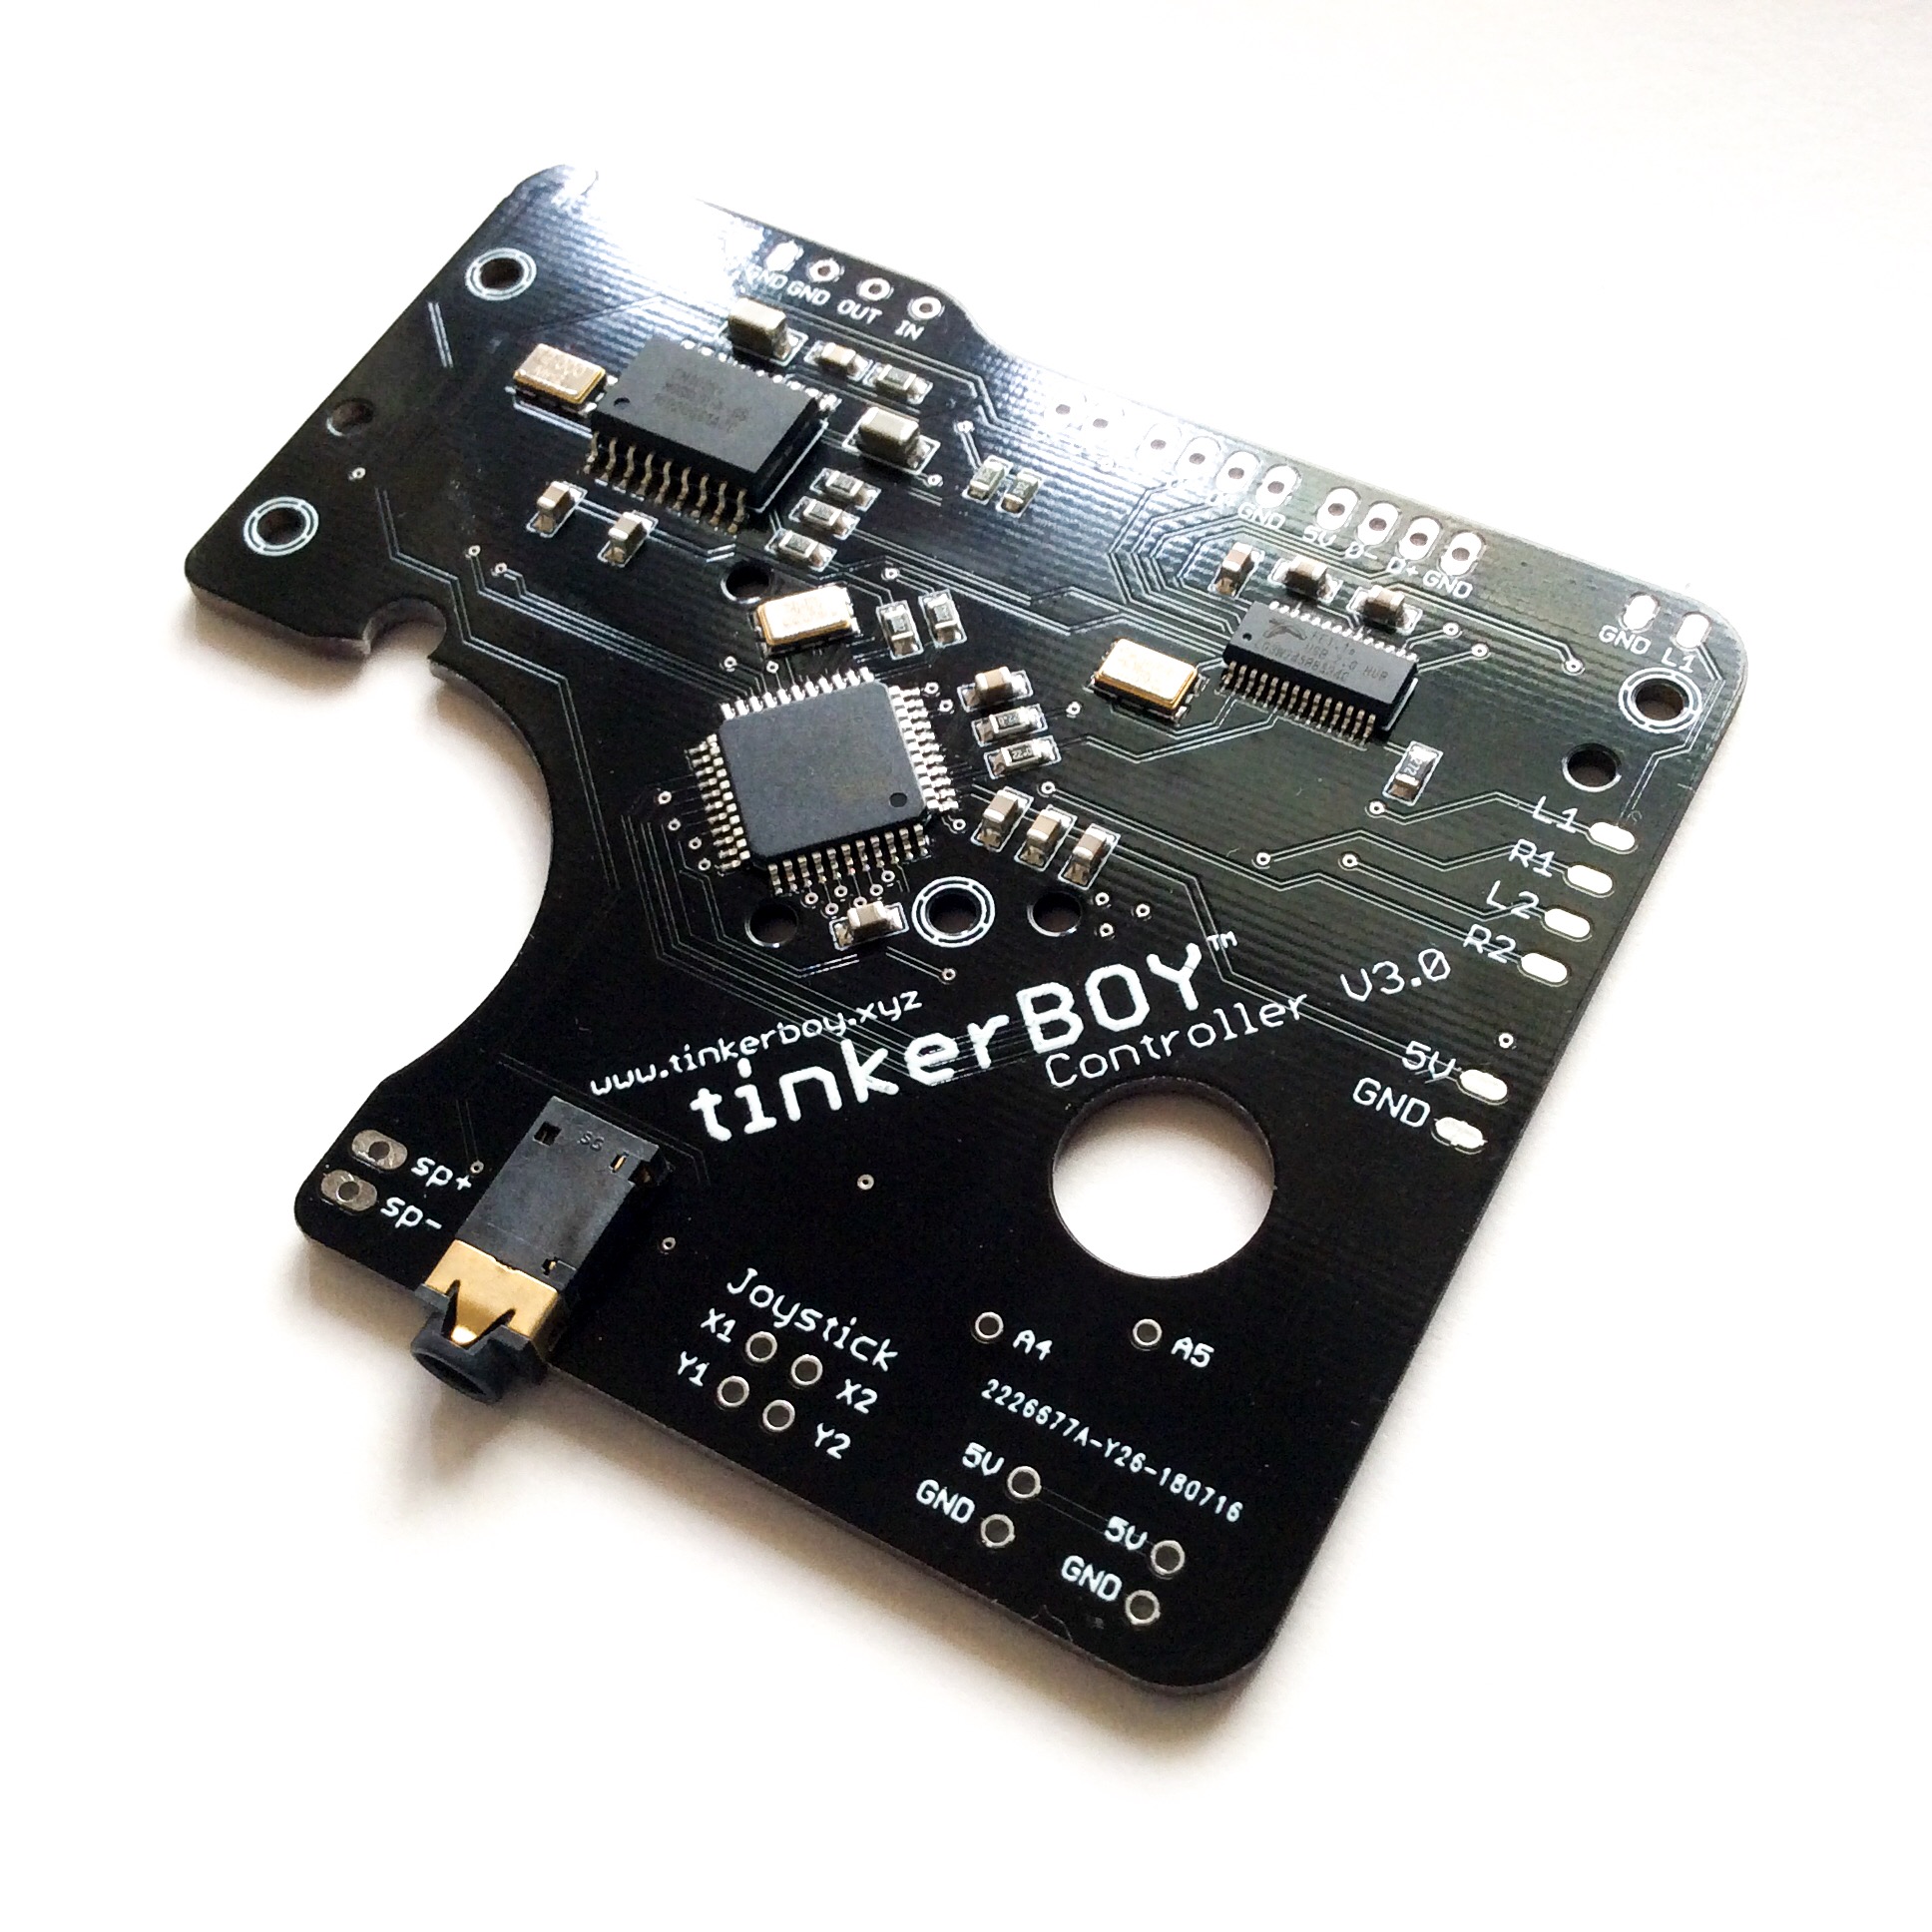 I designed the tinkerBOY Controller V3.0 from scratch so you can easily build your own Raspberry Pi-based Game Boy Zero which is compatible with Pi 4, Pi 2, and Pi 3. It’s a big upgrade from my other controller boards like the v2.0 and v2.2. and all the components I used are USB based in order to minimize wire connections.
The board is already pre-programmed as a USB gamepad and supports two analog joysticks that can be easily enabled via command line on the Raspberry Pi or on Windows PC or Mac.
Building your own Game Boy Zero for the first time is a bit confusing sometimes, especially for beginners without any prior knowledge of electronics. So I’m hoping this page will help you get started with your new tinkerBOY Controller v3.0.
You can download the 6-Button Template and print it in its actual size. If you’re printing it from Chrome uncheck the “Fit to page” from the “Scale” option.
There are two ways you can enable or disable analog joysticks:
Press and hold the “START” button for 15 seconds and reboot. This method only works with Analog Joystick 1. You need Method 2 if you want to enable or disable Analog Joystick 2.
With the builtin usb serial communication of the tinkerBOY Controller v3.0 you can easily enable or disable Analog Joysticks through software. In order to do that, you need install the minicom program by following the instruction at tinkerBOY Controller v3.0: Settings or proceed if you’re using my pre-built RetroPie image.
Start minicom by typing sudo minicom. Start by checking the current status of the Analog Joysticks by pressing ‘a’.
Here’s how to enable or disable one or both analog joyticks:
That’s it. 🙂